Login
HOW TO
Learn how to use our custom T-Shirt Design Studio to design your own t-shirt online in 3 easy steps! Our t-shirt design website is cutting edge and easy to use. If you need further assistance, we are a phone call or an email away! If you live in or near the Nampa area, we are always happy to have you come into the shop for hands-on help with your custom t-shirt design.
*Our Design Studio works best on Google Chrome. Using any other browser may result in unexpected results.
There are a ton of options to choose from in our online designer catalogue. Browse by category, brand, colors, product, SKU and more. We have access to thousands of suppliers, and are constantly adding products to our online catalogue. If you would like to see a product listed in our design studio, just ask!
✓ Browse by category, garment type, brand, color, SKU and more.
✓ Select the garment you wish to customize by simply clicking on it.
✓ On the product page, you can learn more about your selection to determine whether it’s the right fit for you
✓ You can also preview the available colorways for that particular garment. Select a color, but keep in mind that you will be able add / edit your color selection later.
✓ When you are ready to customize your selection, click Start Designing.

✓ Notice the garment color and product selection menu. You can use access this at any time to compare different potential garment colors and styles using your graphic designs.
With The Print Plug’s easy-to-use T-Shirt Design Website you have several options at your disposal for designing your custom t-shirt online. They are:
⚠️ PLEASE REMEMBER
If you want to add your own art, as well as incorporate art and text from our library, be sure to add any assets from our library before adding your own art. Otherwise, your art could get erased from the project when adding assets from our libraries.
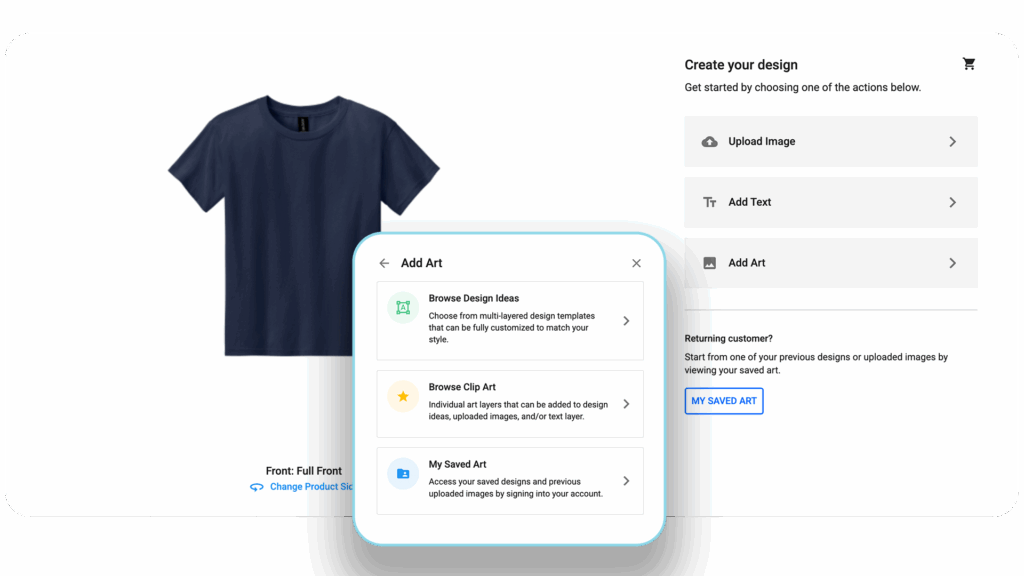
To add premade art from our library, you will select Add Art, and from there you can browse through our art libraries to select relevant art. You can choose from the following library options:
Browse Design Ideas – Design Ideas are multi-layered, editable templates that can be fully customized to your brand and style.
Browse Clip Art – The Clip Art library consists of individual art layers that can be easily added to your design images and text layers.
My Saved Art – When you create an account with us, you can save and access previously uploaded images, as well as previously saved design ideas.
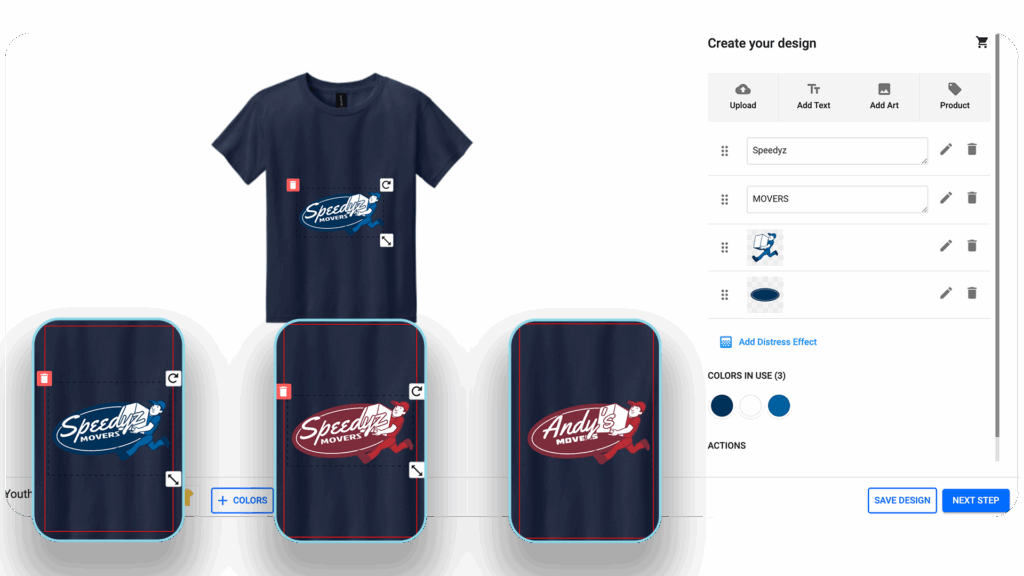
Once you have added art, you can customize and edit virtually every aspect of it, including its sizing, placement, color palettes and specific verbiage.
Simply use the editing fields and menu (on the right-hand side of the screen on a desktop, can vary with mobile providers). Change the wording and colors of the assets to make them unique to your brand. Adjust dimensions and placements by simply clicking and dragging.
Adding and editing text in your custom garment design is simple. Simply select Add Text, and define the variables you want to see.
You can always change the font and color, as well as stylistic variables such as letter spacing, an outline or stroke, and shaping of the text, including arches and circles.
Adding text to your custom designed t-shirts and apparel is super easy! Simply select Add Text, them customize it to your preference. You can
Font Style – Choose from a large library of font styles to incorporate into your custom garment design.
Font Color – Select a font color to help your message pop off the garment.
Font Formatting – Adjust variables such as height, width, outline, and spacing. You can also create arches and circles for a more stylized design.
Once you have added Text and any Art library assets, you can upload your own art work files to the design without risk of overwriting the assets.
Many businesses and brands have their own designs and images that they would like to incorporate into their custom t-shirt design. No problem!
With our online design studio, it’s easier than ever to utilize your own graphics to create custom screen printing, embroidery and DTF apparel.
Simply follow the below guide to begin adding your own art assets to your custom garment design.
You can easily upload art files and graphic assets to incorporate into your custom t-shirt and apparel designs.
✓ It is best to use an SVG, or vector file, for your custom apparel design. This will allow you to have granular control over the details in your image.
✓ Be sure that if you want to use art from the Add Art libraries, you do that before this step.
✓ Select Upload Images in the designer window.
✓ Select File from the Upload Art dialogue box.
✓ Define your Color Profile according to the following steps.
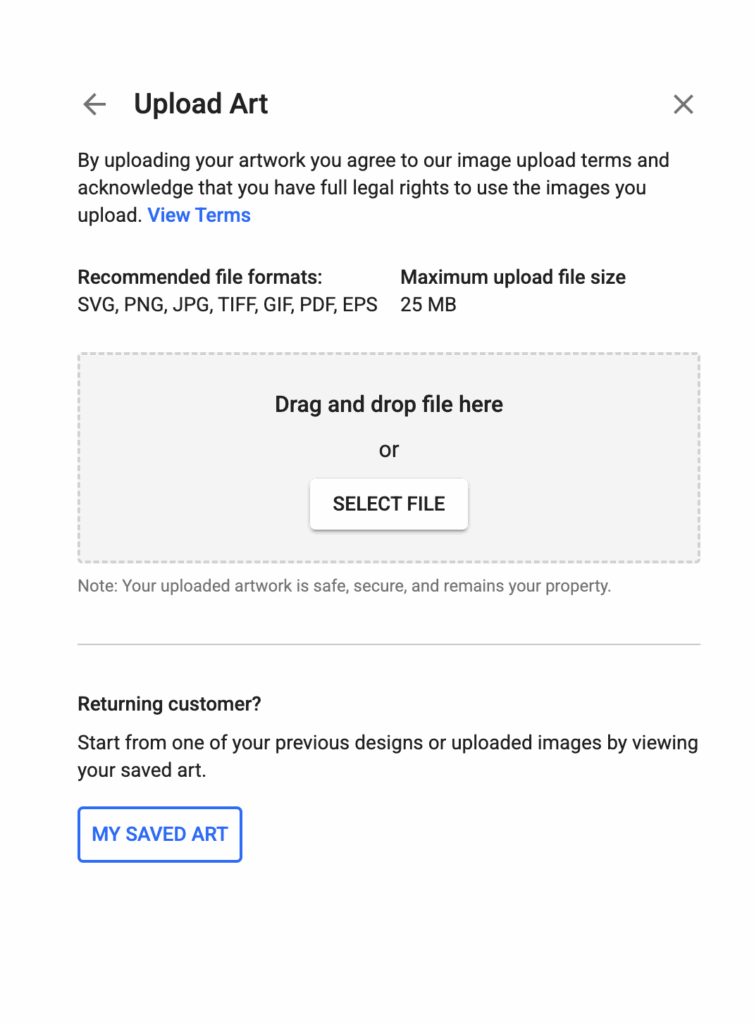
Upon initial upload of your graphic, you will be asked to determine whether you want to retain the white in your graphic, as well as set up your color profile.
White Removal – You have several background removal options to remove either portions of white, or all white, from the image to create a transparent background for your custom design.
Color Profile – Select from a Full Color, Black & White, or Limited Color Profile. Screen Printed Garments have a maximum of 6 colors, while DTG & DTF can accomodate Full Color Profiles.
Color Selection – After selecting your color profile, you can modify which actual colors are included in your image and overall design.
You can adjust size, color and placement after uploading your artwork into the custom design. If you have already added other assets and graphics, you can select and edit each layer individually.
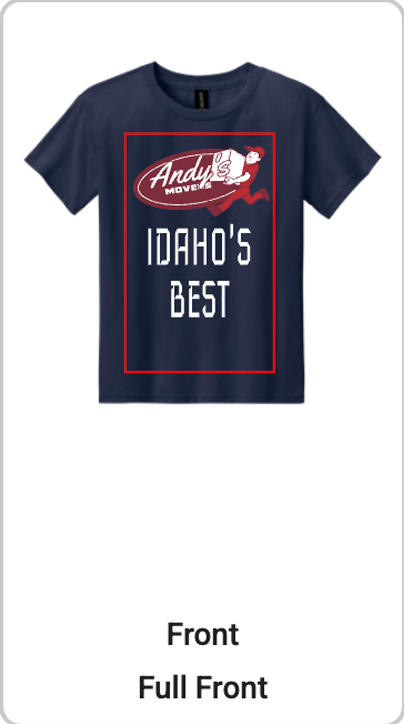
Alter your custom apparel design in a variety of ways. Mix and match images and assets from our library to create a truly unique and custom design.
As always, our team of professional designers are ready to assist you if you ever have any issues with the platform. In fact, The Print Plug offers free design mock-ups on all of our services. If you would prefer to have us handle the design, you can submit art through our Quote Request form, or send us design assets from our library to modify and customize through our Art Portal.

Once you have added an image, you can customize and edit virtually every aspect of it, including its sizing, placement, color palettes and specific verbiage. Simply use the editing fields and menu (on the right-hand side of the screen on a desktop, can vary with mobile providers). Change the wording and colors of the assets to make them unique to your brand. Adjust dimensions and placements by simply clicking and dragging.
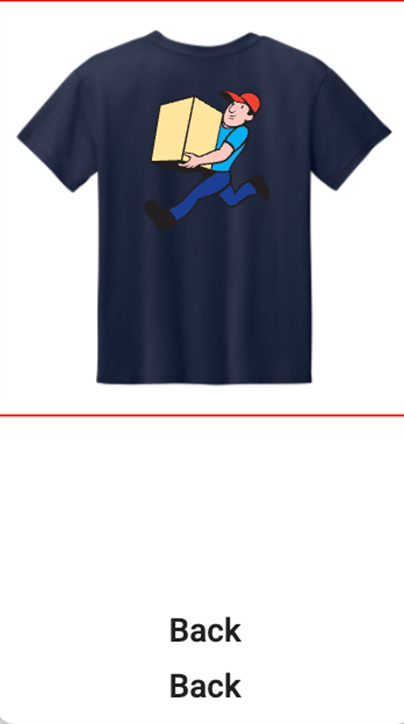
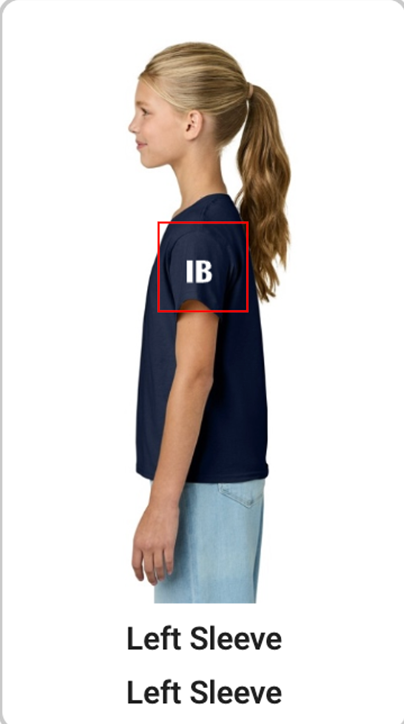
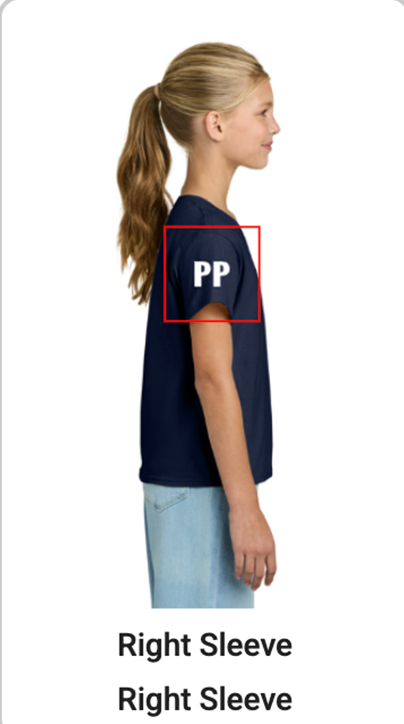
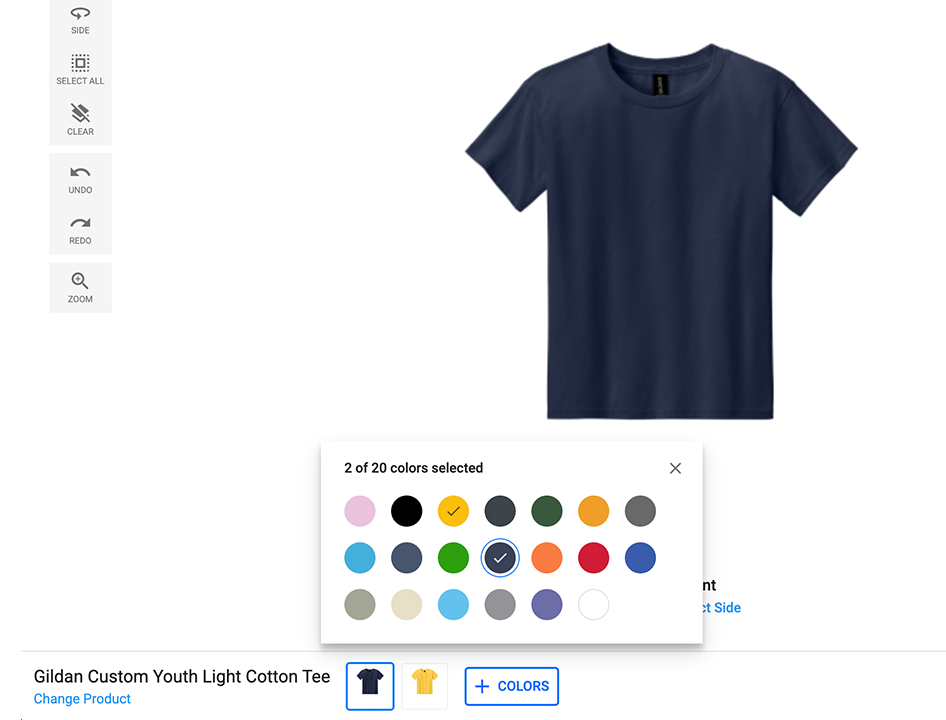
Remember that garment color selection menu we pointed out earlier? This is when it really comes in handy. Having your custom apparel design finished, you can select the different garment / canvas colors to ensure that your design fits well across the different color ways you will use it on.
You can also explore different product types if you would like to purchase additional customized garment styles.
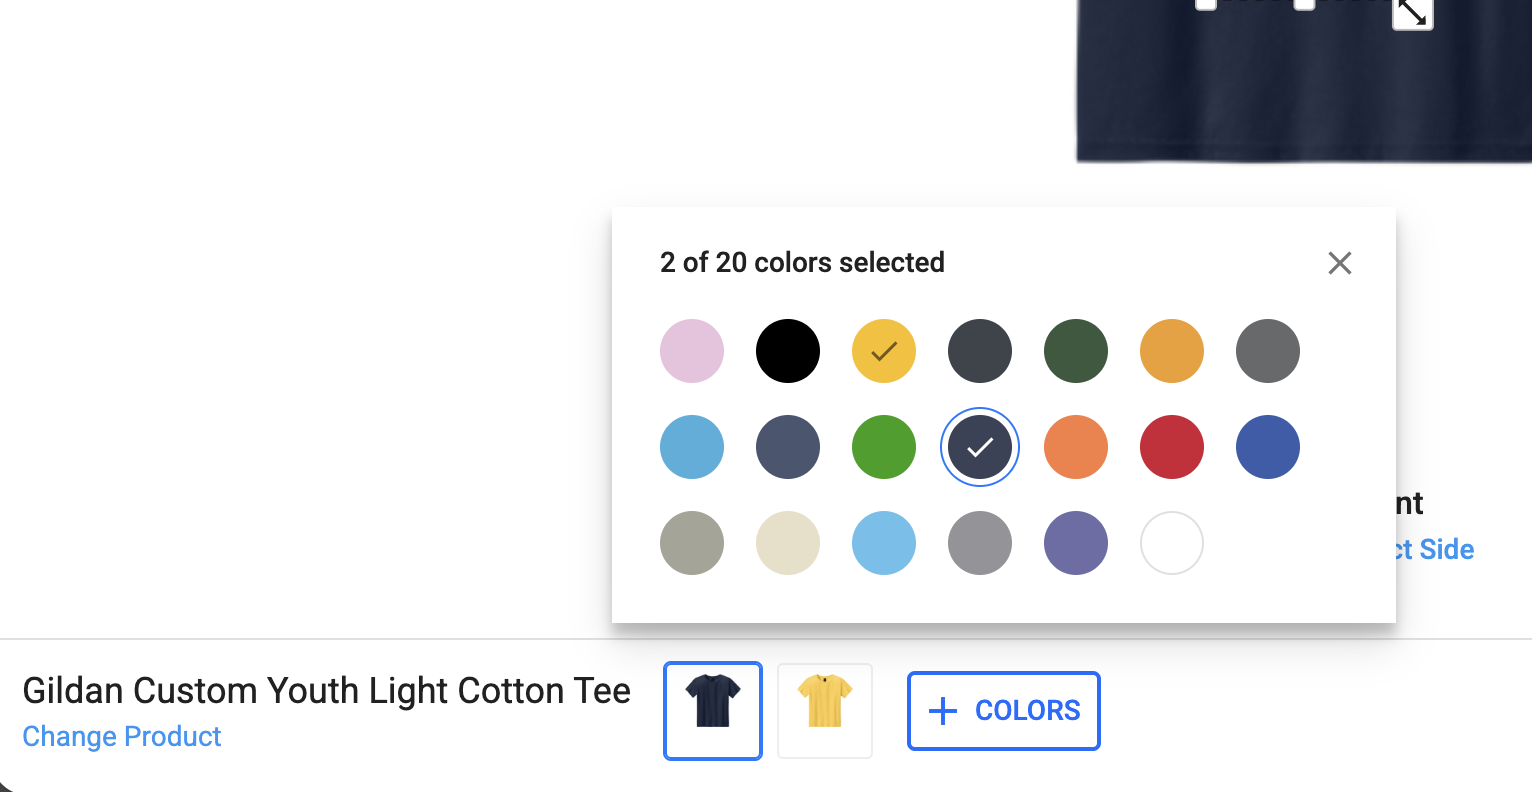
Select all of the different color options that you would like to purchase for your customized garments and apparel. Review your design with each color to confirm that you like the color contrasts and image placements.
✓ Please keep in mind that the garment images used on our website come directly from the manufacturers. Any inconsistencies or issues with the garment images are a result of how their pictures are provided.
✓ We do our best to optimize image issues when we discover them. If you find an issue with garment issues or consistency, please let us know by shooting us an email.
✓ If there are any questions or concerns with a designed garment, we will reach out to you before sending it to production to ensure you are happy with the placements on the garment.
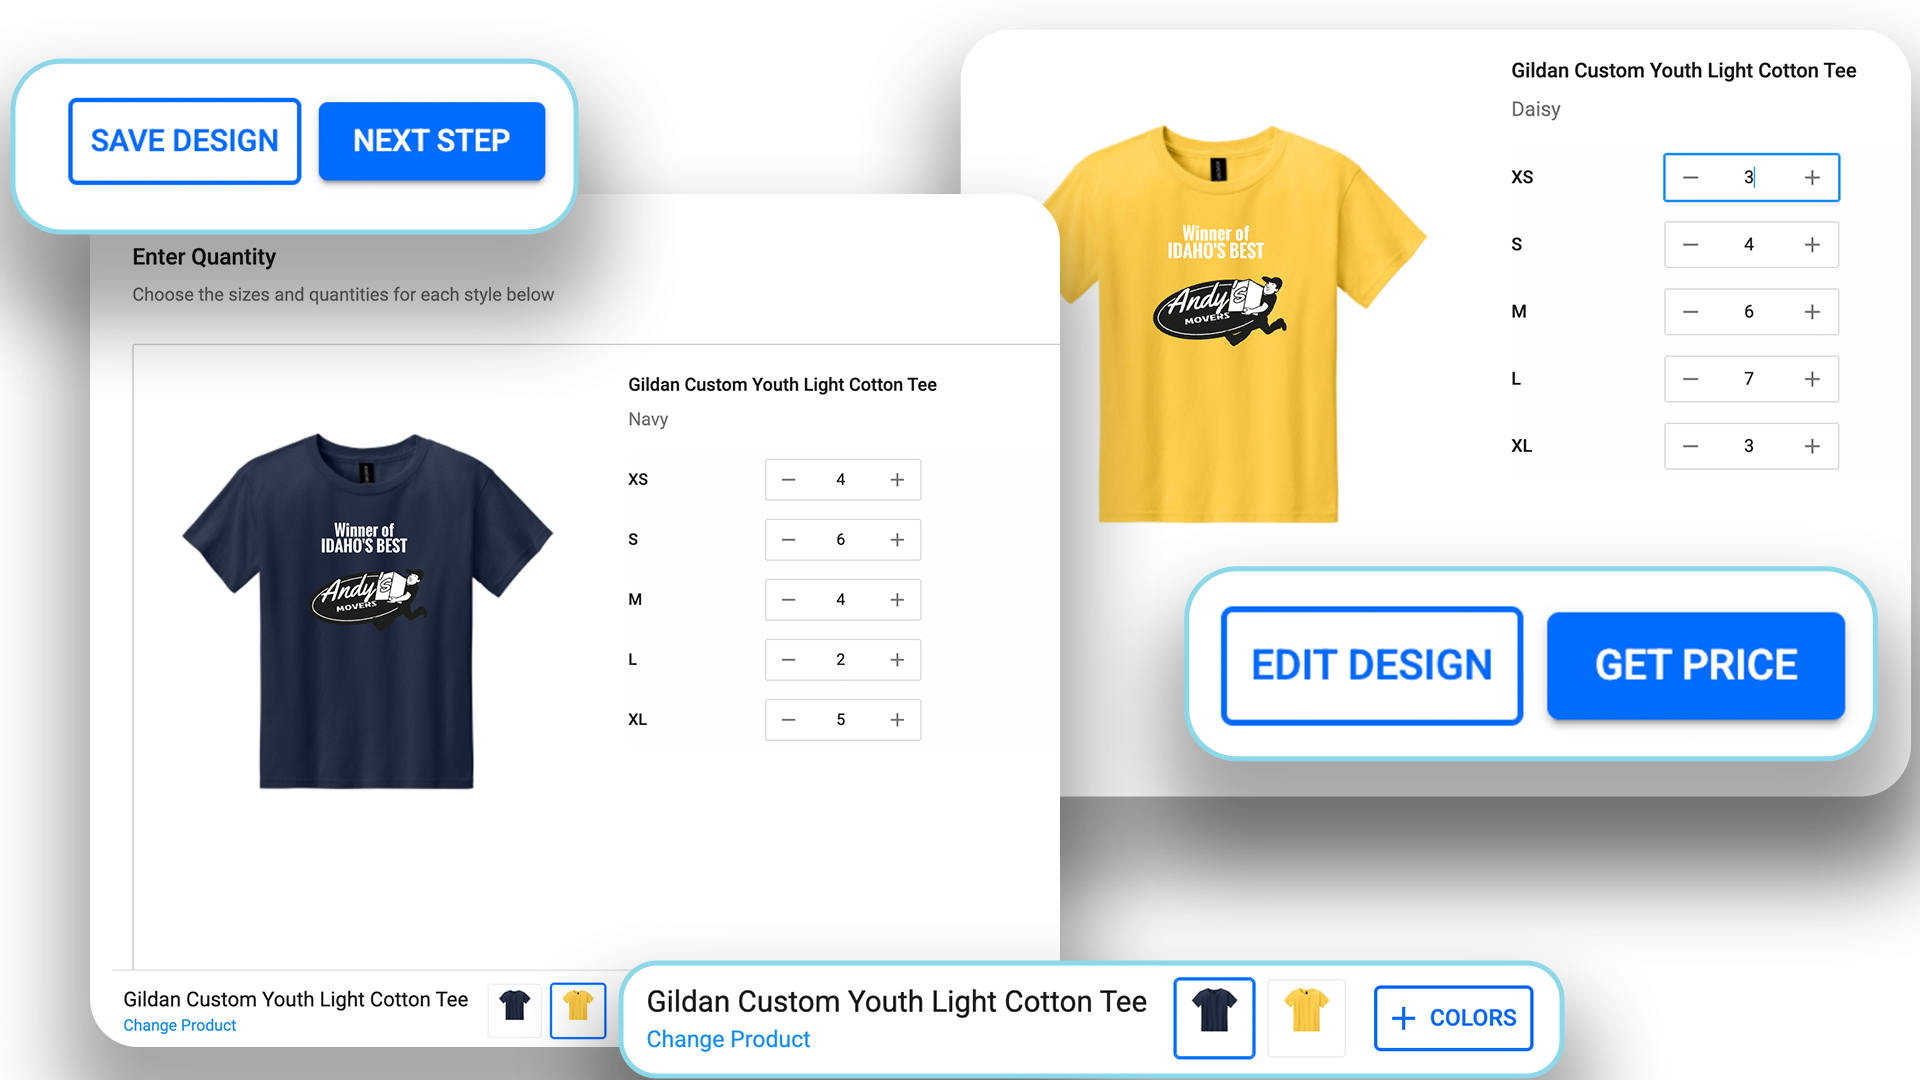
When you’re finished designing your custom t-shirt (or hat, or other promotional item!), you may either begin the check out process, or save your project for a later date (you must have an account created with us to save your projects).
✓ Select Save Design to save your project for later (must create an account)
✓ Select Next Step to begin the checkout process.
✓ Add and confirm your quantity for each size across the selected garment colorways.
✓ You can add more colorways for your garments by selecting + Colors in the menu. You can add as many color options and sizes as you would like. Remember, we offer bulk discount pricing on all of our custom garment orders. That means the more you order, the more you save!
✓ You can change and add other product styles by selecting Change Product in the menu
✓ From there, you can select Get Price or Edit Design to revisit your custom graphics.
Once you have added all the necessary color and sizing options for your custom t-shirts and garments, select Get Price.
You will see an Estimated Item Subtotal. Bulk discounts will be reflected here. But keep in mind; any sales or special offer discounts will not be reflected until the final checkout page. You will also be able to apply any discount codes or coupons at the final checkout page. If you have any questions, as always, don’t hesitate to reach out!
✓ Name your Design to Add it to the Cart.
✓ You can select View Cart, or continue shopping to create more custom t-shirt designs.
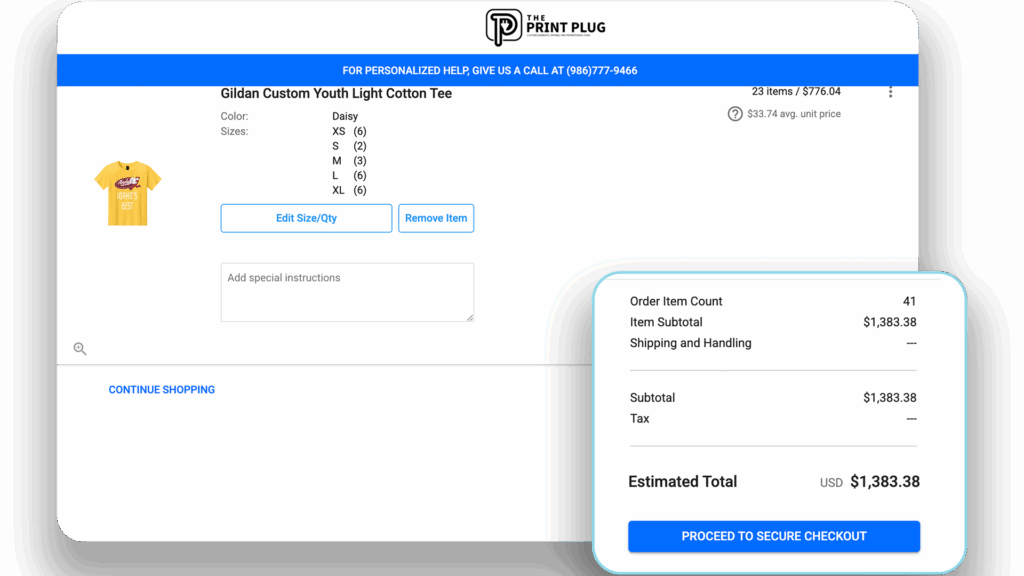
✓ After you’ve selected View Cart, you can select Buy Now or Edit Quantity.
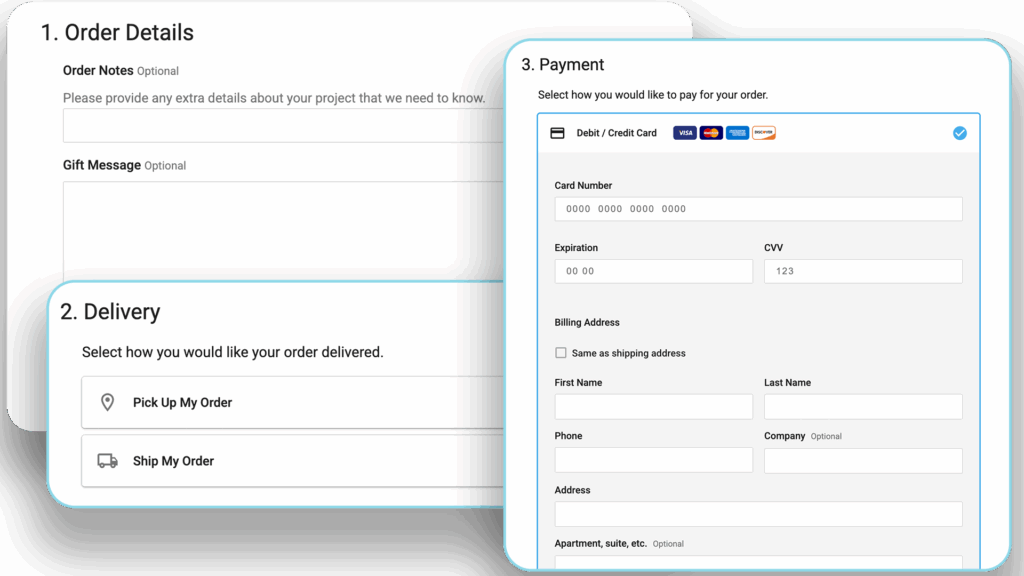
✓ You will enter your personal details on the checkout page.
✓ Enter any discount code you may have on the checkout page as well. This is also where any specials or bundle discounts will be applied.
✓ If you don’t have a discount code to enter, feel free to ask us! We’re super generous folks, and chances are we’ve got one you can have!
✓ Complete your secure checkout and wait for confirmation via email from our production team!